This is an old revision of the document!
Configuring the BIOS
We now need to configure the BIOS of the server motherboard.
You can do this via a keyboard and monitor attached to the server or through IPMI as outlined in a previous section.
The settings and screen shots are all taken from a Supermicro X10SRH-CLN4F, but most are applicable to most server motherboards (I would imagine).
Getting Into Your BIOS
In order to gain access to the motherboard’s BIOS the user is required to press a certain key at a certain point in time (usually as the POST messages are displayed).
Consult your motherboard documentation to find out how to gain access to your motherboard’s BIOS.
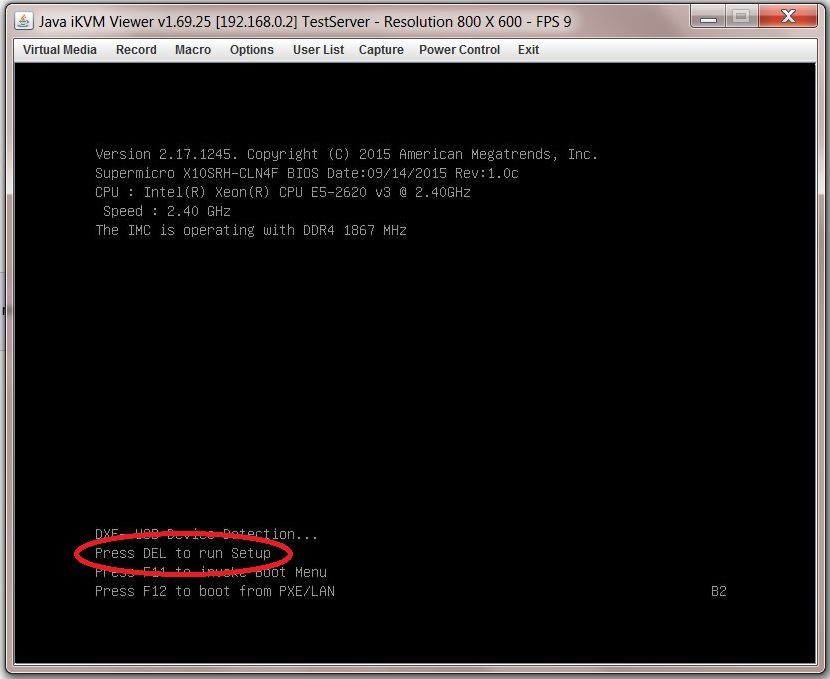
On Fester’s motherboard it is done by pressing the “DEL” key at a specific point.
Incidentally, motherboards usually display a screen at some point during the POST process that tells you what key to press, something like this.
When you have access to the BIOS it’s time to configure it.
Most BIOS settings are navigated using the “←→↑↓” keys.
BIOS Settings
Quiet Boot
This setting is entirely optional.
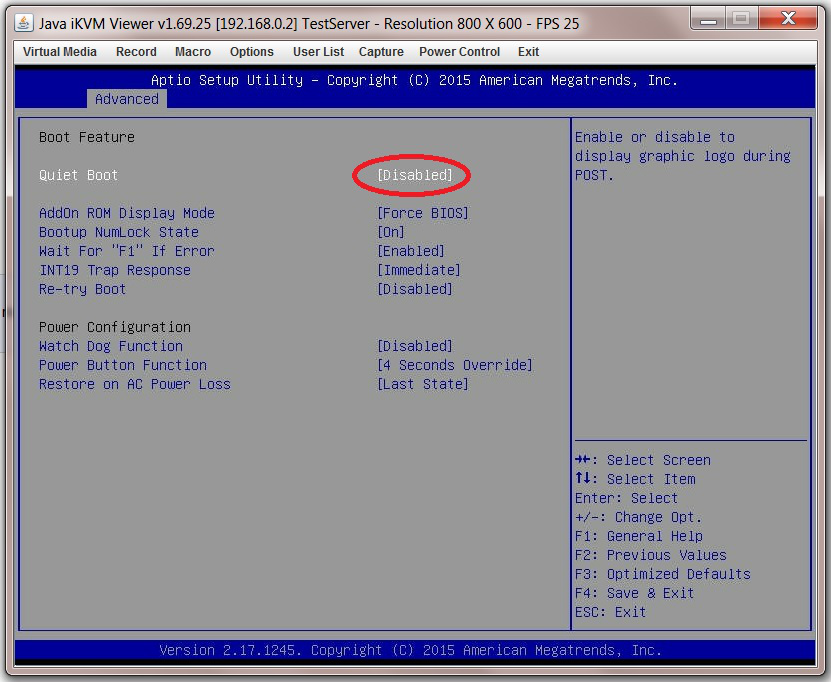
It determines if POST messages are displayed on screen or a graphic logo (so the POST messages are hidden from view) when you first turn on the server. Fester likes to see the POST messages so I disabled this function.
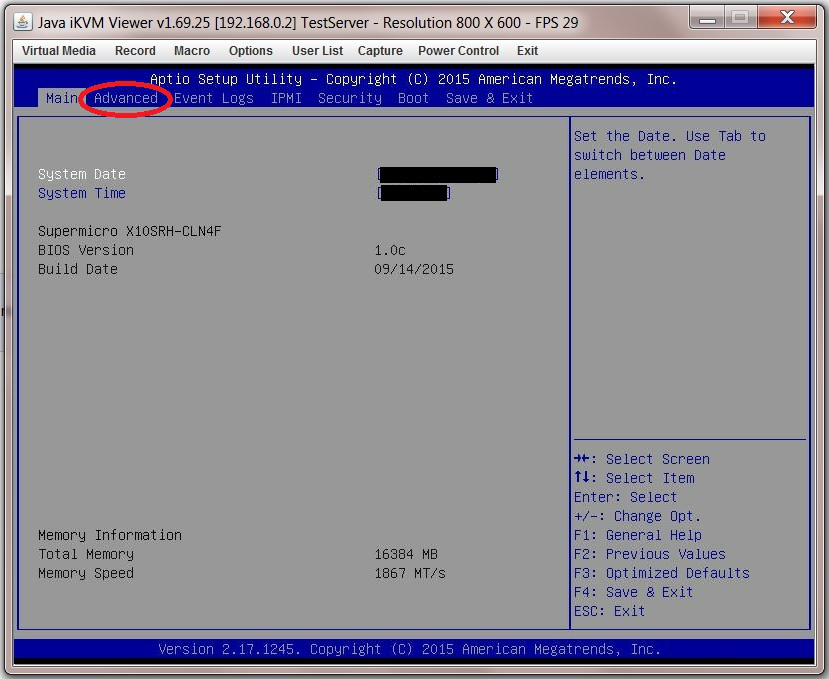
Navigate to the “Advanced” page.
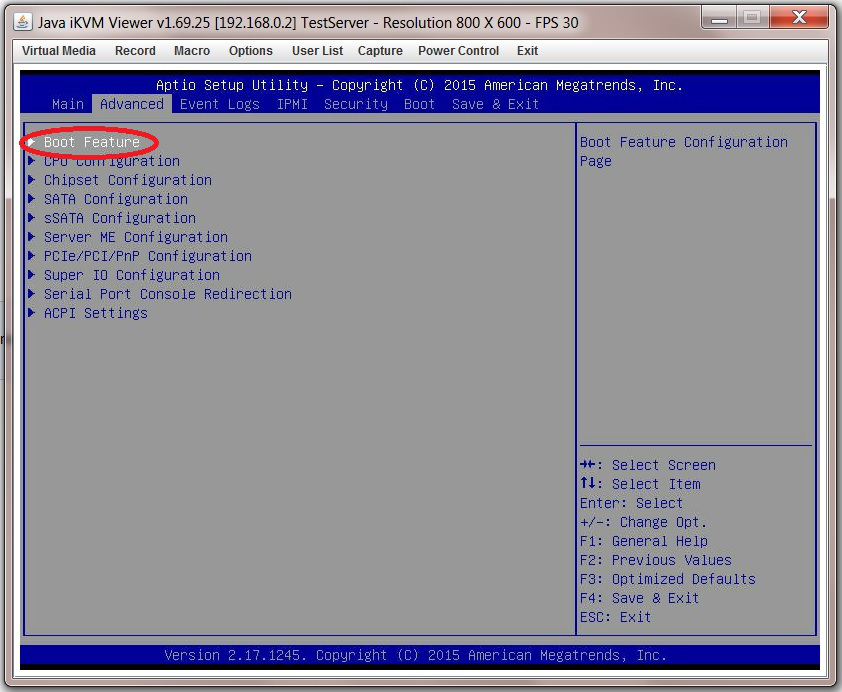
Select the submenu “Boot Feature”.
Now go to “Quiet Boot” and select “Disabled”.
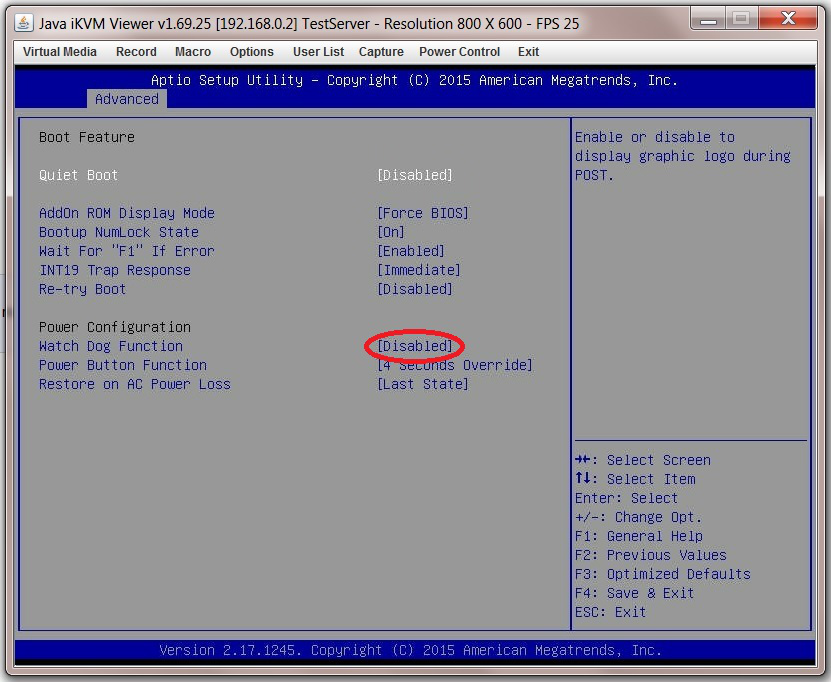
Watch Dog Function
Remain in the “Advanced → Boot Feature” page and select “Watch Dog Function”.
The watch dog function serves to reboot the server if it experiences an error it cannot recover from (and so hangs) for more than 5 minutes. It works by starting a 5 minute count-down timer when the server hangs. When this timer reaches zero the system is forced to reboot.
When I first tried this in FreeNAS it caused my system to spontaneously reboot every 5 minutes even though the system was not hanging, so I disabled it.
AES-NI Encryption
p { margin-bottom: 0.1in; direction: ltr; color: rgb(0, 0, 0); line-height: 120%; }p.western { font-family: “Times New Roman”,serif; font-size: 12pt; }p.cjk { font-family: “Times New Roman”,serif; font-size: 12pt; }p.ctl { font-family: “Times New Roman”,serif; font-size: 12pt; }a:visited { color: rgb(128, 0, 128); }a.western:visited { }a.cjk:visited { }a.ctl:visited { }a:link { color: rgb(0, 0, 255); }
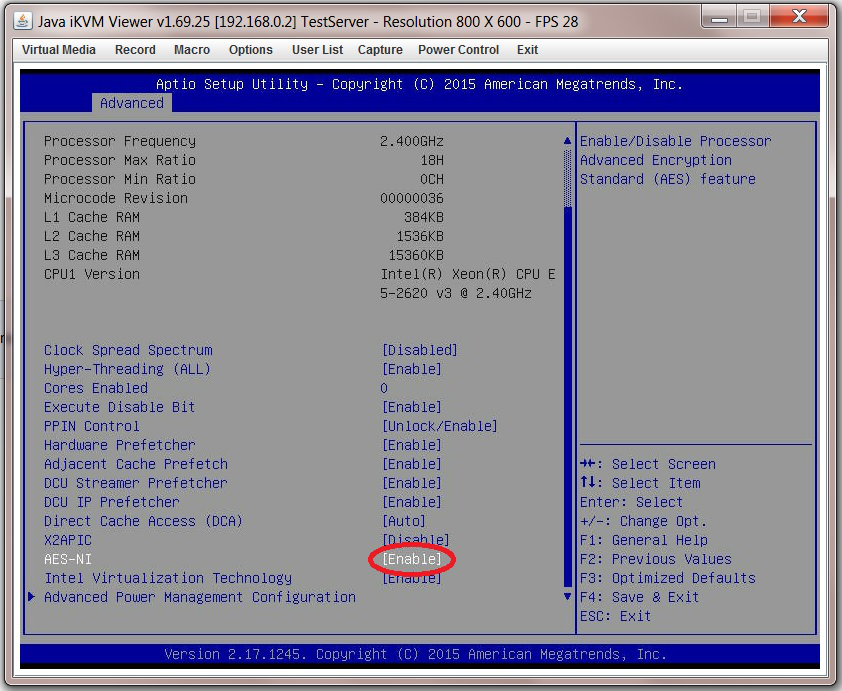
If you intend to encrypt the information on your storage drives then you need to enable this in the BIOS.
This can be useful as it allows a failing HDD in a vdev to be discarded without worrying about wiping the information before disposal.
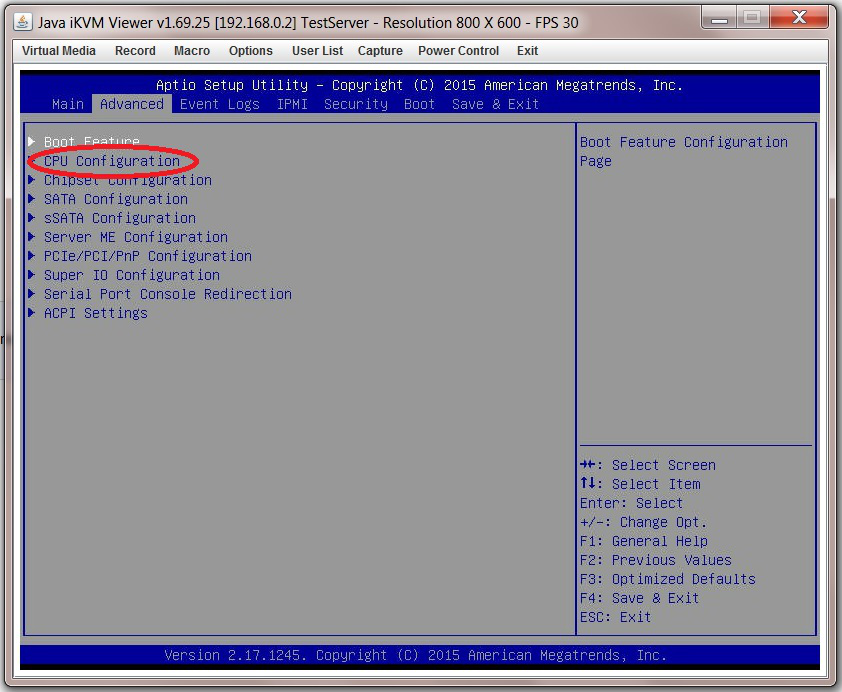
Go to the “Advanced” page.
Now navigate to “CPU Configurtion”.
Then scroll down (it is towards the bottom) to “AES-NI” and select “Enable”.
 Add this page to your book
  Remove this page from your book
  Manage book (
 Help
Help 