Table of Contents
Scrub Schedules
Maintaining your FreeNAS server is very important. It can be the difference between knowing your server may be developing a problem which gives you some time to take remedial action, or getting up one morning and realising your servers bust and the data has been lost.
Part of a good server maintenance routine is performing regular scrubs of the drives and periodically running SMART tests.
There are a few things you need to know before starting.
- Do not schedule scrubs and SMART tests to run at the same time. This can cause the scrub to never complete.
- Only one SMART test at a time can be run on the same disk. We cannot have a scenario were the Long test and the Short test are running simultaneously on the same drive.
- Scrubs and SMART tests are almost pointless on SSDs (Fester does not know why. I can see why surface scans and badblocks tests would be a waste of time, but not scrubs and some types of SMART tests. If anyone knows why let me know and I will try to include it in the guide.).
When considering scrubs and SMART tests all manner of questions arise. What tests should be done? How often?
It is also immediately clear that when scheduling scrubs and SMART tests we must put some thought into this so the two do not coincide with one another.
This should help.
Scrub Schedule For The Boot Device
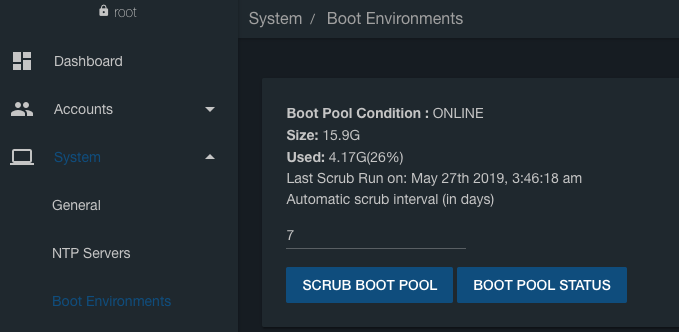
Click “System” in the left column, then “Boot Environments”.
On the line marked “Automatic scrub interval (in days)” change the default value from 35 (this is too long) to 7.
That’s it.
Scub Schedule For The Pool
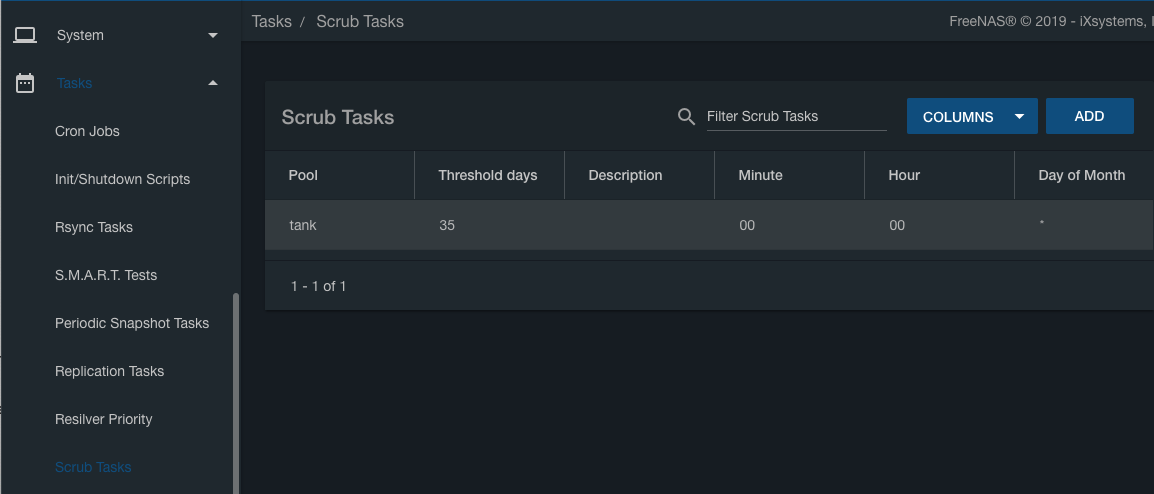
Click “Tasks” in the left column, then “Scrub Tasks”.
You'll see that a default scrub task has been created for your pool, set to run every 35 days at midnight on Saturday. Unless you have a very high resolution monitor (and a very large browser window), you'll need to scroll sideways on the scrub schedule itself to see the rest of this information. There's no obvious visual indication on the screen that this is necessary, but it is. It will look like this when scrolled to the right:
You have two choices here.
You can edit the default scrub schedule by clicking on the three vertical dots to the far right, then “Edit” in the pop-up menu, and populating the settings within with new ones that will follow shortly.
Or you can delete it by clicking on the three vertical dots to the far right, then “Delete” in the pop-up menu, and create a new one (Fester prefers to delete and start from scratch).
If you deleted the default scrub schedule then click the “Add” button.
Whatever option you decided on before a window will pop up.
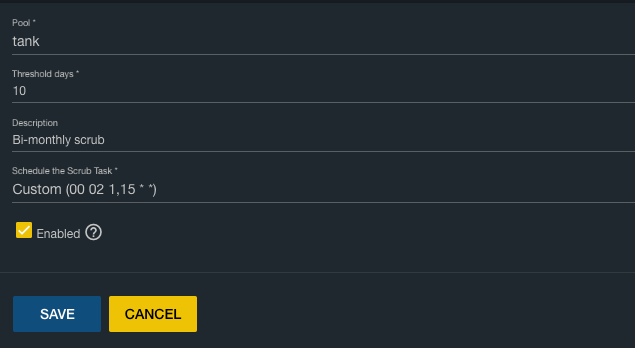
- Select the pool the schedule applies to from the “Pool” drop down selection menu (Fester used tank).
- Set the “Threshold days:” to 10 by typing it into the corresponding text box.
- Give the schedule a meaningful name, if desired in the “Description” text box.
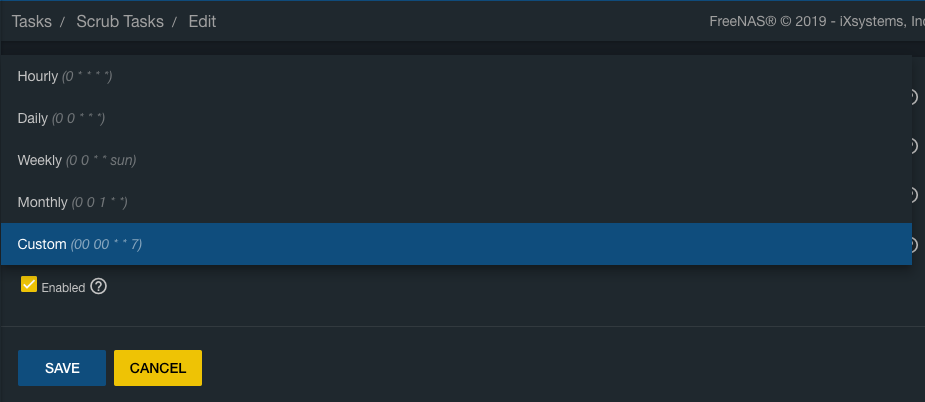
- Fester wants to schedule these tests to run on the 1st and 15th of every month at 02:00am in the morning (the server should not be busy at that time). To do this, under “Schedule the Scrub Task”, select “Custom”.
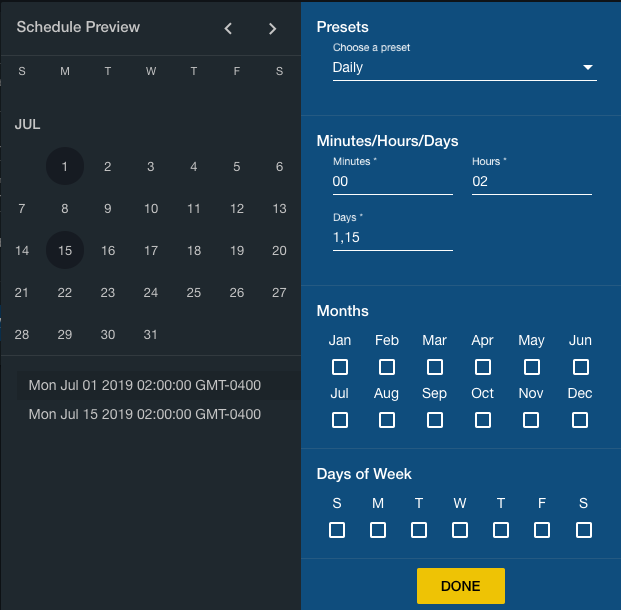
- You'll see a scheduling window pop up. Under the heading of Minutes/Hours/Days, enter 00 for Minutes, 02 for Hours, and 1,15 for days.
- Notice that, on the calendar on the left, you'll see dates marked on which the scrub will run.
- Click the “Done” button.
You'll be returned to the “Edit Scrub Task” screen, with your newly-defined custom schedule showing. Click “Save”.
That’s the scrub schedule set.
